www.kawakib.com
How To Make a Zill Bag or
Finger Cymbal Pouch
Make Your Own Lined
Drawstring Bag!
|
 |
|
Every belly dancer needs a
little bag - for finger cymbals, necklaces, headpieces,
tips...
I recommend that you try crafting this bag with cheap material
first.
Here's what you need: 1/2 yard
of fabric; 1/2 yard of lining material; thin cord for
drawstring; thread.
- 1. Cut out material and lining; if
you want a finger-cymbal bag that's about 6" wide by 4"
deep like the bag pictured here, cut your materials 8"
wide by 12" long (the width stays about the same, but you
need extra for the drawstring 'fold-over').
- 2. Lay the lining and nice material
right sides together and sew along 3 edges (the two long
ones and one short one), about 1/2" from the cut edge.
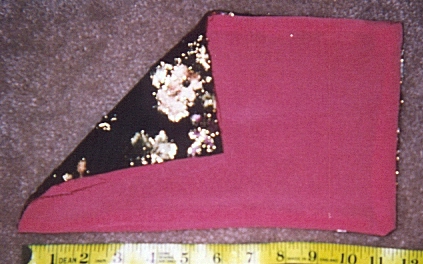
- 3. Turn
it inside out so the sewn edges are now inside, and you
have a long unlined bag with lining material on one side
and the nice material on the other. (it's helpful to iron
it flat at this point - see photo below)
- 4. Fold this in half so the nice
material is together, and lining is outside. Sew along 3
edges as before, starting and ending about one and a
half inches from the top.
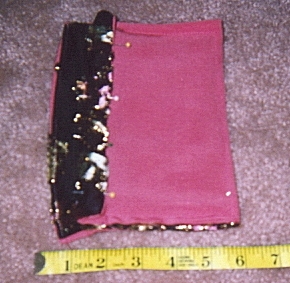
- 5. One of the top edges is 'raw,'
the other is nicely finished. Tuck in the raw edges and
sew them closed. (photo below shows right-sides folded
together and sewn along 3 sides, leaving the top edges
open so they can be folded under and sewn - see pins in
photo)
- 6. Turn the bag right-side out. Fold
in each top edge once and sew; this leaves an opening at
each side for the drawstring. (see photo below)
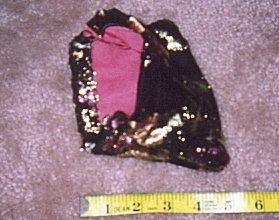
- 7. For this 6" x 4" bag, cut two
pieces of cord 14" long. Get a pin and thread them in,
one starting and ending on one side, the other starting
and ending on the other side, and knot each cord's ends
together. Pull - your bag is closed! (in this photo I've
already threaded in one drawstring cord, the other one
will end up knotted together on the other side)

© 2013 Anthea
Kawakib Poole