Zaghareet! Magazine (Sept/Oct
2011)
FOR BEGINNERS
by Anthea Kawakib Poole
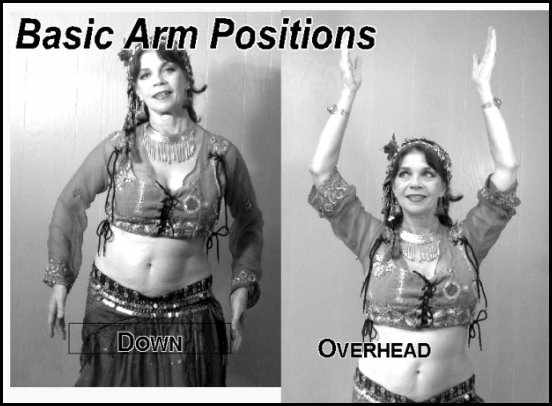
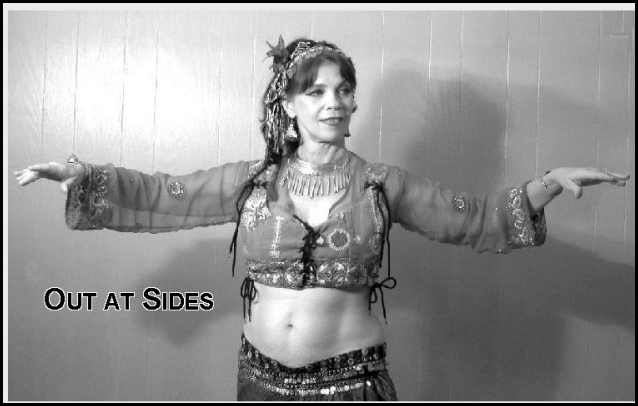
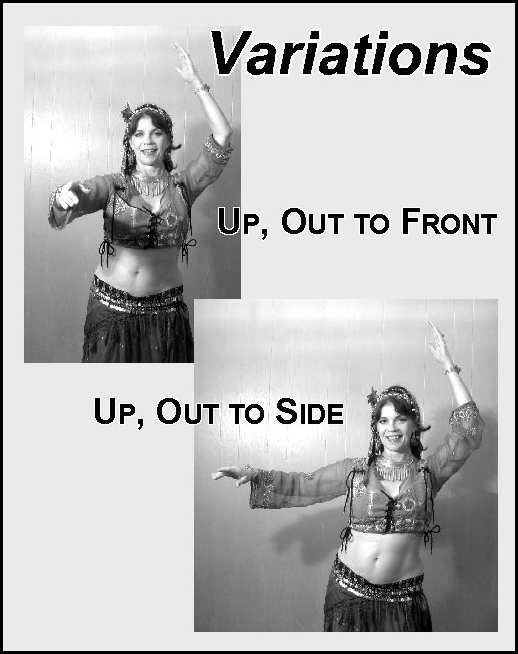
Expanding from our last two
articles on Arm Positions, we have seven basic (and beautiful)
arm positions to use while dancing. These photos show the Basic
Positions and their Variations (note that several
poses can be reversed to the opposite side, not shown).
This article will take your arms from Basic to Beautiful in
3 easy steps!

To learn the basic positions well, pick only two arm positions to focus on in a short dance combination of your own creation. I’ll leave the music and tempo up to you - just use music you like or want to dance to.
For instance: 4 counts of a
smooth hip movement (like a figure-8 or hip rolls), then 4
counts of a sharp hip movement (like lifts or thrusts); then
repeat that 8-count segment for a total of 16 counts.
So for example, you might have:
Remember we’re focusing on the
arm MOVEMENT between poses, which is the "Transition".
Make your TRANSITION between the sections quick and graceful -
with no wasted movements.
So you’re thinking all this
sounds suspiciously like a drill too? Well, it is in a way, but
you can turn drills into dance by using a few “performer
secrets” like smiling or changing expressions; turning or
tilting your head; facing different directions, as I did in the
photos, instead of just blankly staring at yourself in the
mirror! Try it and see what a difference those little secrets
make!
Once you’re comfortable with your sequences and feel confident that your arms are going strongly from one position to the next, experiment withIN your combinations like this:
Break your 4-count sequence
up into 3 + 1, for instance, using the figure-8/thrust example,
instead of doing each movement for 4 counts as we did above, do
your figure-8 for 3 counts, and finish with a thrust on count 4.
Voila - instant pizazz!
Now you can repeat that combination (including your arm positions), until it’s familiar and comfortable, but WITHOUT sacrificing any of the good technique you’ve been working on. Your focus is on Position, then Transition to (another) Position.
Explore those transitions! Stop dancing for a few moments to experiment with the transition between the two arm positions you’re using. Maybe your arms can swoop down in a flowing circle as they go from one position to the next; or maybe they can cross each other as they go down - or up - in front of you...
This step is more complex but
a lot of fun - and, if you can feel the momentum of your arms as
they move through space it can open up a new dimension in your
dancing. Dancing is about feeling, after all, and when a dancer
can not only move but also enjoy the movements, it has a
powerful effect the dancer as well as the audience!
The next article explains how
an advanced
or professional dancer uses arm movements, complete with
video!